Commands
Commands are what make OMATA work. Inside a flow commands will be executed one after the other and the action will be applied.
Add a command
Create a new flow or just open an existing one. On the top right click on the plus icon.
The command library will open. Pick a command from the list and add to your flow.
Customize a command
Click on a command to adjust the properties and what it should perform.
How to customize a command is covered in the next section "Modes".

Building the logic / nesting of commands
Order of execution
The order of commands from top to bottom counts. When you run the flow (with the play icon at the top) each command will be executed one after the other from top to bottom.
In this example first "Create rectangles" is executed. Then "Create ellipse". Then "Create star". Simple.

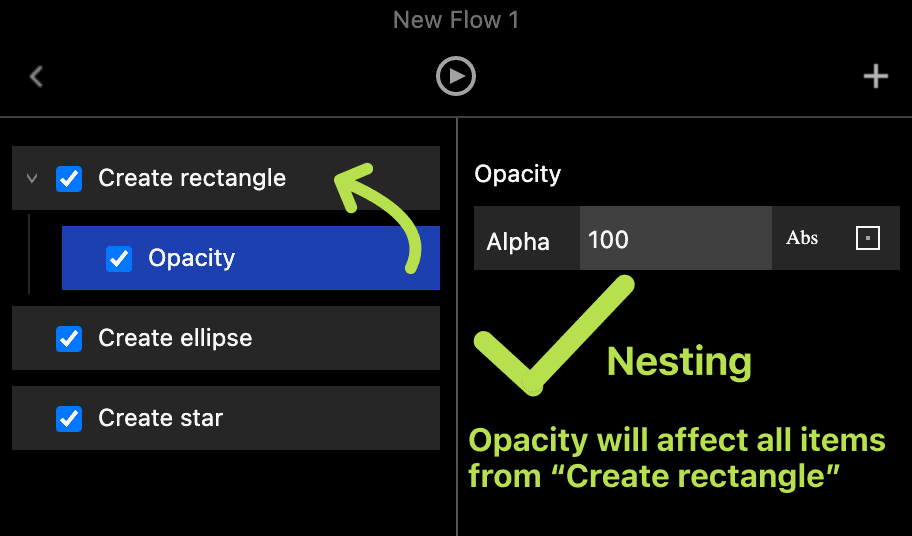
Nesting
In the example above the commands run independently from each other.
Let's say we want to change the opacity of the rectangles.
What do we need to do? We need to drop a command inside "Create rectangle". We need to nest it inside "Create rectangle".
Add the opacity command from the library.
Grab it and nest it under "Create rectangle" (check video below).
This is really important to understand how OMATA works:
by nesting a command, it operates on the results (here rectangles) from the parent command.
Correct nesting:
Wrong nesting:

What if we also want to change the rotation of our rectangles?
Now, we need to add a rotation command and nest it also under "Create rectangle".
In the example the following is happening:
Rectangles are created.
Opacity of the rectangles is changed.
Rotation of the rectangles is changed.
Ellipses will be created.
Stars will be created (a star is born!)
Remember: a command operates on the result of it's "parent" command. In this case the results are newly created rectangles.
Please let me know how this page can be improved:
support@omata.io